

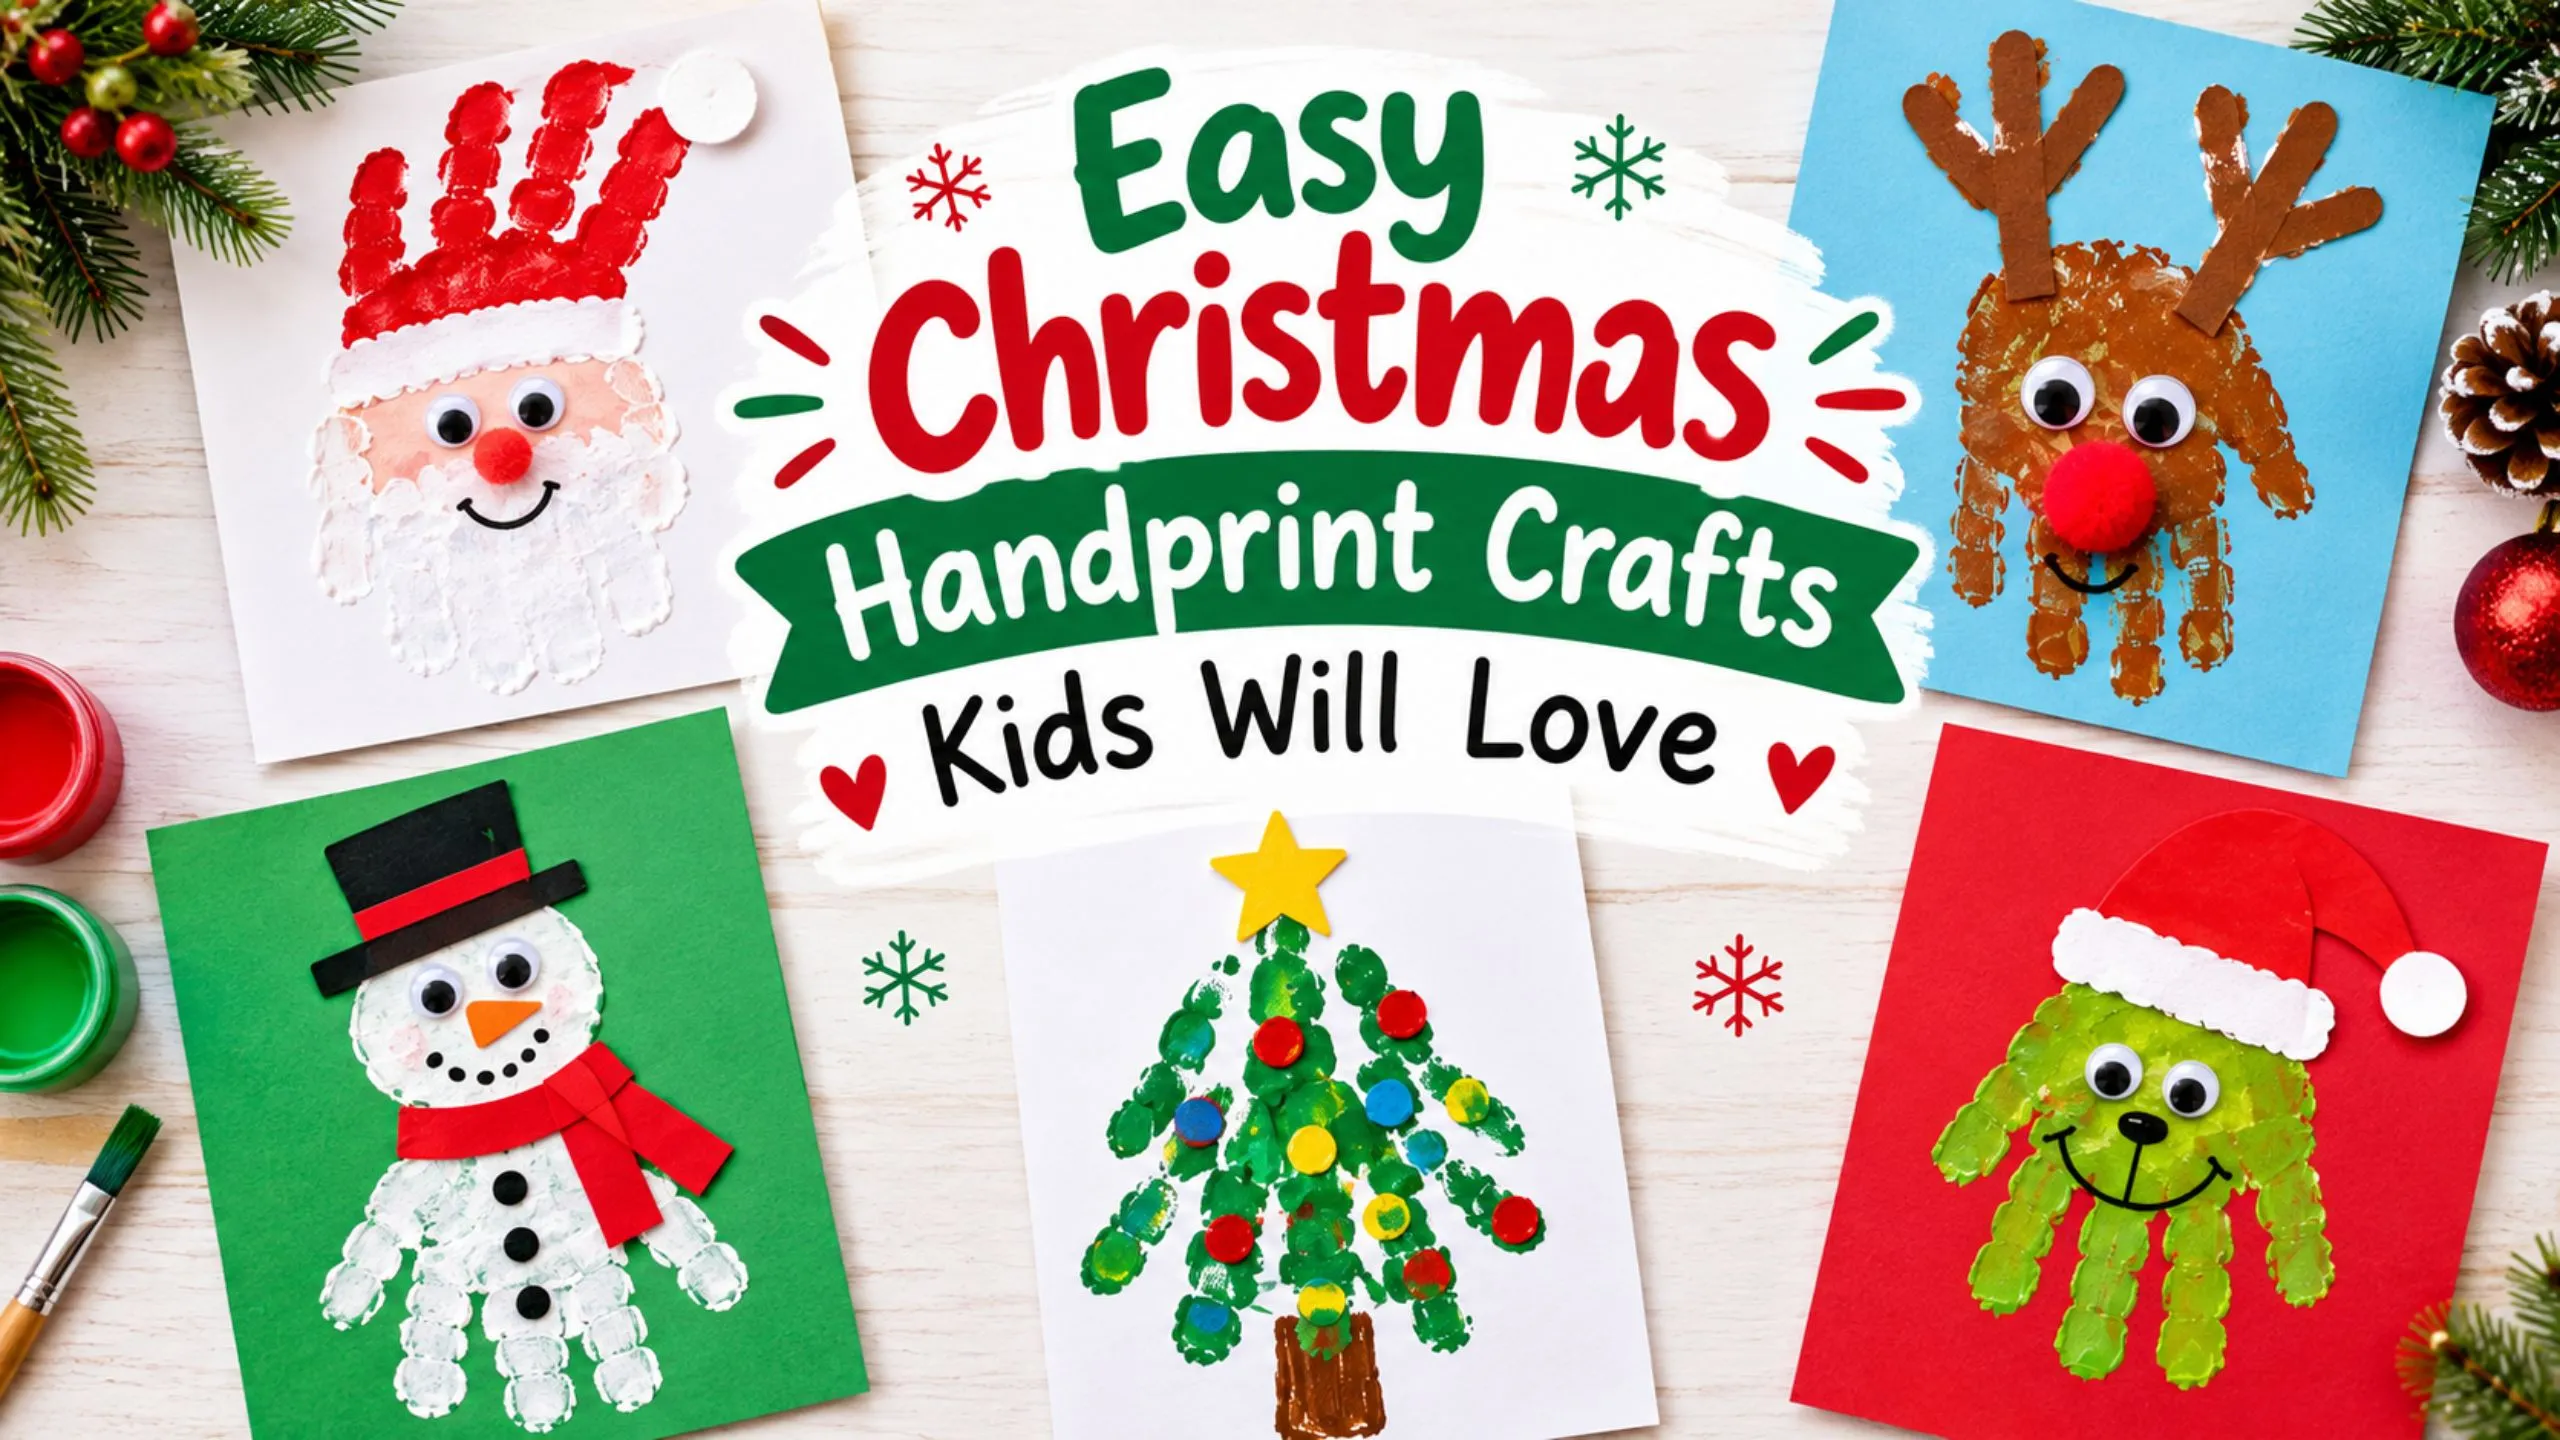
Christmas handprint crafts are simple, meaningful projects that capture your child’s hand or footprint into keepsakes that last for years. You can make them three ways: salt dough ornaments (baked, most durable), air-dry clay (no oven, quick), or painted handprints on paper or cards (instant results, lowest mess). They’re cheap to make (~$5–25 total), perfect for kids of all ages, and grandparents absolutely treasure them.
Why Handprint Crafts Matter More Than You Think
Handprint crafts aren’t just activities to fill a rainy afternoon. They’re time capsules. That little handprint you make when your child is three? When they’re fifteen, you’ll look at it and remember exactly how small their hand was. Parents and grandparents keep these ornaments forever hanging them on the tree every December, watching the collection grow, telling stories about which Christmas each one marks.
Beyond nostalgia, handprint crafts teach kids fine motor skills, boost creativity, and let them be part of the gift-giving process. Even a two-year-old can press their hand into clay. A five-year-old can paint and decorate. A teenager can make them for younger cousins or as gifts for teachers.
Let’s get into the best ideas and how to actually make them.
Top 5 Easiest Handprint Crafts for Beginners
If you’re short on time or unsure where to start, try one of these first. Each takes under 30 minutes (not counting drying time) and requires supplies you likely have at home.
1. Painted Handprint Santa Card (5–10 minutes)
Paint your child’s palm skin-tone and fingers white. Press onto cardstock. Use a Sharpie to add eyes, mouth, and a pink nose. Done. This one works for babies to grandkids, no skill required.
- Difficulty: Beginner | Mess: Low | Drying time: 5 minutes
2. Salt Dough Handprint Ornament (Active time: 15 min | Drying: 1–2 days)
Mix flour + salt + water into dough, roll it out, press in a handprint, cut a circle around it, bake at 200°F for 1–2 hours, paint, seal. The slowest part is waiting, but the results are heirloom-quality.
- Difficulty: Beginner | Mess: Medium | Cost: ~$1
3. Construction Paper Christmas Tree (15 minutes)
Trace your child’s hand on green paper 5–7 times, cut them out, glue them in a triangle shape (fingers pointing up), add a brown trunk and yellow star. Instant keepsake.
- Difficulty: Beginner | Mess: Very low | Cost: Free (if you have paper)
4. Fingerprint Christmas Lights Card (10 minutes)
Draw a wavy line on cardstock. Have your child make fingerprints along the line in different colors (red, green, yellow, blue). Boom Christmas lights. Frame it or send it as a card.
- Difficulty: Beginner | Mess: Low | Drying time: 5 minutes
5. Footprint Reindeer (10 minutes)
Paint your toddler’s foot brown, press it on paper (heel down, toes up). Add antlers, eyes, and Rudolph’s red nose with markers or paint pen.
- Difficulty: Beginner | Mess: Low–Medium | Age: Best for 1–3 year-olds
Materials Showdown: Which Method Is Right for You?
The three main approaches each have different pros and cons. Here’s how to choose:
| Factor | Salt Dough | Air-Dry Clay | Painted Handprints |
| Cost | ~$1 (flour, salt at home) | $5–15 (buy clay) | $5–10 (paint, paper) |
| Setup time | 10 min (mix dough) | 0 min (ready to use) | 5 min (prep paper) |
| Active craft time | 15–20 min | 15–20 min | 10 min |
| Drying/baking | 1–3 hours baking + overnight curing | 24–48 hours air-dry | 5–15 minutes |
| Durability (sealed) | 20+ years | 10–15 years | 5–10 years (depends on paint) |
| Detail quality | Excellent (captures fine lines) | Good (slightly softer) | Very good (instant color) |
| Best for ages | 2–10 | 2–12 | 1–100 (literally everyone) |
| Mess factor | Medium (flour dust, cleanup) | Low–medium (no mixing) | Low (contained) |
| Oven required | Yes | No | No |
| Beginner-friendly | Yes (simple recipe) | Yes (no mixing) | Yes (hardest to mess up) |
Salt Dough Deep Dive
Why use it? Salt dough is the classic for good reason. It’s cheap, durable, and captures incredible detail. A sealed salt dough ornament can hang on your tree for 20+ years without cracking or fading.
The recipe (makes enough for 3–5 ornaments):
- 1 cup all-purpose flour
- 1 cup salt
- ½ cup water (add more if too dry, more flour if too wet)
Mix, knead until smooth, roll out to ½-inch thick. Press in a handprint. Cut around it with a knife or cookie cutter. Bake at 200°F for 1–2 hours (thin pieces may only need 45 minutes). Don’t rush the temp higher heat causes puffing.
Pro tip: Air-dry the ornaments for 12–24 hours before baking. This cuts baking time in half and reduces puffing.
Common mistakes:
- Using self-rising flour (it puffs)
- Baking too hot (they crack or bubble)
- Pressing too hard (smudges the handprint)
- Skipping the sealing step (they fade or absorb humidity)
Air-Dry Clay Deep Dive
Why use it? No oven. No mixing. Just press, let sit overnight, and you’re done. Perfect for impatient kids or classrooms.
Best brands for handprints: Crayola Air-Dry Clay (softest, best for small hands) and Sculpey Super Sculpey Polymer (more durable if you can also bake it). Avoid Das clay it’s too dense for clear handprints from small children.
The catch: Air-dry clay doesn’t capture detail quite as sharply as salt dough. The material is slightly grainier. But it’s faster and requires zero oven management.
Sealing: Once dry (24–48 hours), paint with acrylics and seal with Mod Podge or matte acrylic spray. Sealed air-dry clay lasts about 10–15 years.
Painted Handprints Deep Dive
Why use it? Instant gratification. No waiting. The handprint is colorful and ready to display within minutes. Perfect for cards, gifts, and instant memories.
Paint types:
- Acrylic paint (best): Vibrant, quick-drying, long-lasting, non-toxic washable options available
- Washable paint (fine for fun): Good for young kids, easier cleanup, fades faster over time
- Fabric paint (if using a shirt/mug): Permanent after heat-setting
Best surfaces: Cardstock (cards), canvas (wall art), white paper (framed), or ceramic paint pens on mugs/plates.
Pro tip: Use non-toxic acrylic paint if kids might mouth their hands (babies/toddlers). Wash hands immediately after.
15 Best Handprint Christmas Designs
Below are our top 15, organized by format. Each includes supplies, a quick summary of steps, and age suitability.
ORNAMENTS (5 Designs)
1. Salt Dough Santa Handprint Ornament
Best for: Ages 2+ | Time: 2–3 hours (mostly baking) | Difficulty: Beginner
Supplies: Salt dough, acrylic paint (skin tone, red, white, black), Sharpie, Mod Podge, baker’s twine, hot glue gun
Steps:
- Roll out salt dough to ½-inch thick
- Press child’s hand into dough, fingers together
- Cut a circle or oval around the handprint
- Use a straw to punch a hole at the top
- Bake at 200°F for 1–2 hours until hard
- Paint palm skin-tone, fingers white (beard)
- Add eyes and a red nose with paint or Sharpie
- Seal with Mod Podge; attach twine with hot glue
Why it works: This is the #1 most-recognizable design. The handprint becomes Santa’s face, and you can’t mess it up.
2. Air-Dry Clay Christmas Tree Ornament
Best for: Ages 3+ | Time: 24 hours | Difficulty: Beginner
Supplies: Air-dry clay, acrylic paint (green, brown, yellow, glitter), Mod Podge, twine
Steps:
- Roll clay into a ball, flatten into a disk about ½-inch thick
- Press child’s hand into clay, fingers spread wide
- Cut around the handprint in a tree shape or simple oval
- Make a small hole at the top with a toothpick
- Air-dry 24–48 hours
- Paint fingers green (tree branches), palm brown (trunk), add a yellow star on top
- Seal with Mod Podge; attach twine
Variation: Flip the handprint upside down so the fingers become a tree crown naturally.
3. Rudolph Handprint Ornament (Salt Dough or Clay)
Best for: Ages 3+ | Time: 1–2 days | Difficulty: Beginner
Supplies: Dough/clay, brown paint, red paint (Rudolph’s nose), googly eyes or paint markers, Mod Podge
Steps:
- Press handprint into dough with fingers spread
- Paint the whole handprint brown
- Paint or glue a bright red circle for Rudolph’s nose at the base of the palm
- Add eyes (googly eyes glued on, or paint two black dots)
- Optional: Add small antlers with paint or clay scraps at the top
Pro tip: This works at any age. Even a 1-year-old’s footprint makes a cute Rudolph.
4. Thumbprint Snowman Ornament (Painted)
Best for: Ages 2+ | Time: 20 minutes | Difficulty: Beginner
Supplies: White cardstock, washable/acrylic paint (white, black, orange), paintbrushes, Sharpie, glue
Steps:
- Paint three large thumbprints stacked vertically on cardstock (white paint)
- Let dry
- Add black paint dots for eyes and mouth on each circle
- Paint a small orange triangle for the carrot nose
- Draw on a top hat, scarf, or stick arms with Sharpie
- Laminate or seal; attach twine for hanging
Why it works: Toddlers can do this almost independently. Instant results, endless variations.
5. Multi-Hand Family Wreath Ornament
Best for: Ages 2–12+ (whole family) | Time: 2 hours | Difficulty: Beginner Medium
Supplies: Salt dough or air-dry clay, acrylic paint, Mod Podge, holly leaves (drawn or paper), small red beads (glue on for berries)
Steps:
- Roll out a large piece of dough and cut a circle (or use a large cookie cutter)
- Each family member presses their handprint around the circle’s edge, overlapping slightly
- Cut a small gap at the bottom (opening of wreath)
- Bake or air-dry
- Paint handprints in family colors (or all green with red details)
- Glue on tiny red pom poms or beads as holly berries in the center
- Seal with Mod Podge
Keepsake value: This is huge for memories. In 10 years, you’ll look at your baby’s tiny handprint next to your teenager’s and get emotional.
CARDS & GIFT TAGS (3 Designs)
6. Handprint Christmas Card (Painted)
Best for: Ages 1–10 | Time: 15 minutes | Difficulty: Beginner
Supplies: Cardstock or cardboard, acrylic paint, paintbrush, markers, optional: glitter, sequins, ribbon
Steps:
- Fold cardstock in half to make a card
- Paint child’s hand (or feet) with festive colors
- Press onto the front of the card
- Once dry, add details with markers or paint pens (eyes, mouth, ornaments, Santa hat)
- Write a message inside
Ideas:
- Hand as a candy cane (red and white stripes)
- Hand as a Christmas tree (green with ornaments)
- Hand as a reindeer (brown with antlers drawn on)
- Multiple colored handprints as a wreath
7. Handprint Gift Tags (Construction Paper)
Best for: Ages 2+ | Time: 20 minutes for 6–8 tags | Difficulty: Beginner
Supplies: Colorful construction paper, markers, scissors, hole punch, twine, acrylic paint or markers
Steps:
- Cut construction paper into 2″×3″ rectangles
- Paint or trace a handprint on each
- Let dry
- Add a festive design (Santa hat, reindeer antlers, tree star) with markers
- Punch a hole and thread twine
- Write the gift recipient’s name
Bulk option: Make a batch of 10–12 at once. These are perfect for wrapping presents or labeling cookies on a plate.
8. Fingerprint Christmas Lights Card
Best for: Ages 1–6 | Time: 15 minutes | Difficulty: Beginner
Supplies: White cardstock, paint (red, green, yellow, blue, etc.), paintbrush or ink pad, black marker
Steps:
- Draw a wavy line across the cardstock with black marker
- Have child make fingerprints along the line in different colors (one fingerprint = one light)
- Optional: Write “Merry Christmas” or “Happy Holidays” above or below
- Let dry; frame or mail
Why this works: So simple a baby can do it. Adults think it’s cute. It’s instant and mess-free if you use an ink pad.
MUGS & PLATES (3 Designs)
9. Handprint Santa Mug
Best for: Ages 3+ | Time: 30 minutes (if using ceramic paint pens) | Difficulty: Beginner–Medium
Supplies: White ceramic mug, ceramic paint pens or oil-based paint markers, clear sealant spray (optional)
Steps:
- Clean the mug thoroughly and let dry
- Have child hold their hand flat with fingers together
- Trace around the handprint on the mug with a pencil (light, erasable)
- Use red paint pen for fingers (Santa hat), skin tone for palm (face)
- Add eyes, mouth, white beard with paint pens
- Let dry fully (24 hours); use the mug after that
- Optional: Spray with clear sealant for extra durability
Pro tip: Ceramic paint pens (Posca brand) are more durable than regular markers. Hand-wash; don’t microwave.
10. Footprint Christmas Tree Mug
Best for: Ages 1–3 | Time: 30 minutes | Difficulty: Beginner
Supplies: White mug, ceramic paint pens (green, brown, yellow, red), optional clear coat
Steps:
- Paint child’s foot with green paint
- Press foot onto the mug with toes pointing up (creates a tree shape naturally)
- Paint a brown rectangle at the base for the trunk
- Add yellow star on top and small red ornaments down the tree
- Add the child’s name or the year
Why it works: The foot-to-tree shape is instant. Parents love drinking their morning coffee from their kid’s handprint mug.
11. Handprint Serving Plate (Ceramic or Melamine)
Best for: Ages 2+ | Time: 1 hour | Difficulty: Beginner
Supplies: Plain ceramic or melamine plate, ceramic paint markers or oil-based markers, optional: clear coat
Steps:
- Wash and dry the plate completely
- Each family member traces or paints their handprint around the rim
- Add names, dates, or small drawings inside the handprints
- Let dry fully
- Seal with clear acrylic coat if using regular paint
Keepsake use: Display on a shelf, use for holiday cookies, or gift to a grandparent with a photo of the handprints.
GROUP & FAMILY PROJECTS (4 Designs)
12. Family Handprint Christmas Tree (Large Canvas or Poster)
Best for: Ages 2–12+ (whole family) | Time: 1–2 hours | Difficulty: Beginner
Supplies: Large canvas (16″×20″ or bigger), acrylic paint (green, brown, gold, family colors), paintbrush, Mod Podge (optional)
Steps:
- Paint a large brown triangle on the canvas for the tree trunk
- Paint a large green triangle above for the tree
- Each family member paints their handprint on the tree (in different colors or all green with different details)
- Add a gold or yellow star at the top
- Write names or the year in the corner
- Seal with Mod Podge if you like; hang on a wall
Display idea: Make a new one every year and hang them together in a hallway the tree grows as your family grows.
13. Multi-Generational Handprint Wreath (Painted)
Best for: Family gathering project | Time: 1–2 hours | Difficulty: Beginner–Medium
Supplies: Large paper plate (the base) or poster board cut into a circle, acrylic paint (green, red, gold), paintbrush, markers, glitter glue, googly eyes
Steps:
- Cut out the center of the paper plate to create a ring (or draw a large circle on poster board and cut it out)
- Each person paints their handprint on the ring in green
- Layer the handprints to create a wreath effect
- Paint red circles (berries) in clusters between handprints
- Add a gold bow at the bottom with paint or glitter glue
- Write names and the year
Gift angle: Frame it or laminate it; mail it to a grandparent. It’s a multi-generational hug in frame form.
14. Handprint Plaque for Grandparents
Best for: Ages 2–8 | Time: 2–3 hours | Difficulty: Beginner
Supplies: Wood plaque (6″×8″ or larger), acrylic paint, paintbrush, wood stain or finish, hot glue gun, optional embellishments (ribbon, bells)
Steps:
- Paint or stain the plaque (natural wood or holiday color)
- Each child paints their handprint on the plaque
- Paint small details (face, Santa hat, reindeer nose) on the handprints
- Let dry fully
- Write a message at the top (“From [Child’s Name],” “Christmas [Year],” “We love you!”)
- Seal with clear acrylic coat; glue a small hook or easel to the back
Why it works: Grandparents treasure these. They’re personal, handmade, and prove their grandkids made them.
15. Classroom Handprint Garland
Best for: Classrooms or large groups | Time: 1–2 hours | Difficulty: Beginner
Supplies: Colorful construction paper, markers, paint or paint markers, scissors, hole punch, string or yarn
Steps:
- Cut 2″×3″ rectangles from different colored paper (one per student)
- Each student paints or marks their handprint on a rectangle
- Add their name and decorative details
- Punch two holes at the top of each
- String them together with yarn to create a garland
- Hang across the classroom or hallway
Classroom magic: Parents see their kid’s handprint, teachers have an instant holiday decoration, and kids feel proud.
Age Guide: Which Crafts for Which Kids
Handprint crafts work across ages, but some fit better at different stages:
Babies (0–12 months)
Focus on footprints, handprints with hand-over-hand help, and quick-drying projects. Mess is expected.
- Best crafts: Fingerprint card, footprint reindeer, painted handprint on cardstock
- Why: Babies can’t grip tools, so simple paint + paper works. Messy is fine.
- Paint type: Use non-toxic, washable paint; wash hands immediately.
Toddlers (1–3 years)
They can press their hand into clay or paint with adult guidance. Keep it simple; expect mess.
- Best crafts: Salt dough handprint ornament, painted handprint Santa, air-dry clay, footprint cards
- Why: They enjoy the sensory input (squishing dough, feeling paint) and can follow one-step instructions.
- Challenge: Sitting still. Keep it to 15 minutes max.
Preschoolers (3–5 years)
They can follow 2–3 step instructions, hold a paintbrush, and decorate. Independent with light adult guidance.
- Best crafts: All of them. They can do salt dough, paint details, add googly eyes, write their name.
- Why: Motor skills are improving; they’re proud of their work and want to show it off.
- Bonus: They can make gifts for siblings, teachers, or grandparents with genuine pride.
Big Kids (5–10+)
They want more control and detail. Let them design variations.
- Best crafts: Multi-hand wreath, handprint plaque with names, intricate painted designs, plating/mug decoration
- Why: They can handle precision, understand the keepsake value, and enjoy creating gifts.
- Challenge: They might think it’s “babyish.” Frame it as “making heirlooms” or “gifts Grandma will treasure forever.”
Tweens & Teens (10+)
They can make sophisticated keepsakes for siblings, cousins, or grandparents.
- Best crafts: Plaque projects, mug designs, canvas art, multi-generational pieces
- Why: They can handle the emotional angle (“Grandpa will hang this forever”) and want to make something meaningful.
Supply Cost Breakdown & Shopping List
Question: How much will this cost me?
Answer: It depends on your approach. Here’s the range:
DIY Approach (Supplies at Home)
- Cost: $0–5 (if you have flour, salt, paint, paper)
- What you need: Flour, salt, water, paint or markers, paper
- Best for: Testing the craft, quick projects, budget-conscious families
- Limitation: Limited paint colors; basic supplies only
Basic Craft Supplies Starter Kit
- Cost: $15–25 (one-time purchase)
- What you get: Quality acrylic paint set (8–12 colors), brushes, air-dry clay, construction paper assortment, glue
- Best for: Families planning to do multiple projects through the season
- Reusable: Yes, for years
Full Handprint Kit (Quality Materials)
- Cost: $25–50
- What you get: Salt dough supplies, quality paint set, clay options, mod podge, sealer spray, brushes, paper/cardstock, glitter, embellishments
- Best for: Serious crafters wanting premium results
- Reusable: Most items last for years
Bulk Classroom Supplies
- Cost: $75–150+
- What you get: Large quantities of paint, clay, paper, glue for 20+ students
- Best for: Teachers, scout leaders, large groups
- Reusable: Yes, lasting multiple years
Quick Shopping List (for 3–5 handprint projects)
- Acrylic paint set (8–12 colors): $8–12
- Paintbrushes (variety pack): $5
- Salt & flour (if making dough): $3
- Air-dry clay (optional): $5–8
- Cardstock / construction paper: $5
- Mod Podge or sealer spray: $5
- Twine, ribbon, embellishments: $5
- Total: ~$35–40 for everything
Preservation & Storage: Making Them Last
You’ve made a beautiful handprint ornament. Now: How do you keep it for the next 20 years?
Sealing for Longevity
Best sealing methods:
- Mod Podge (or similar craft sealer): Brush on 1–2 coats. Creates a slightly glossy finish. Protects from moisture and dust. Lasts 20+ years when sealed.
- Acrylic spray sealer (matte or gloss): Quick, even coat. Matte finish feels more natural. Apply in a well-ventilated area.
- Polyurethane (oil-based): Durable and water-resistant. Slightly yellows over time (adds vintage charm). Better for salt dough.
- Laminating: Paper-based crafts (cards, painted handprints) can be laminated at a print shop (~$2 per item). Lasts indefinitely.
Unsealed ornaments: Last 10+ years if stored carefully, but they’re more fragile and can absorb humidity or dust.
Storage Tips
- Use an archival box: Not a plastic tub (which can trap moisture). Use a decorative cardboard box lined with acid-free tissue.
- Wrap individually: Wrap each ornament in acid-free tissue paper. This prevents chipping and dust.
- Label everything: Write the child’s name, age, and year on a small tag. Future-you will thank you.
- Cool, dry place: Avoid attics (temperature swings) and basements (humidity). A closet shelf is ideal.
- Climate: High humidity can cause salt dough to absorb moisture and mold (rare but possible). If you live in a very humid climate, consider storing in a sealed container with a small silica packet.
Troubleshooting Common Issues
Problem: Paint is cracking or peeling
Cause: Paint too thick, low-quality paint, inadequate sealing
Fix: Sand lightly, repaint with thin coats, seal with Mod Podge
Problem: Ornament feels sticky or brittle
Cause: High humidity, inadequate sealing, age-related
Fix: Store in a dry place; consider re-sealing with a fresh coat
Problem: Handprint is faded or discolored
Cause: UV exposure (sunlight), age, humidity
Fix: Display away from direct sun; keep in a box most of the year
Problem: Salt dough ornament has small cracks
Cause: Over-baked, temperature too high, clay too thick
Fix: Minimal cracking is normal and adds character. Seal well to prevent spreading.
Why Handprints Become Heirlooms: The Memory & Growth Angle
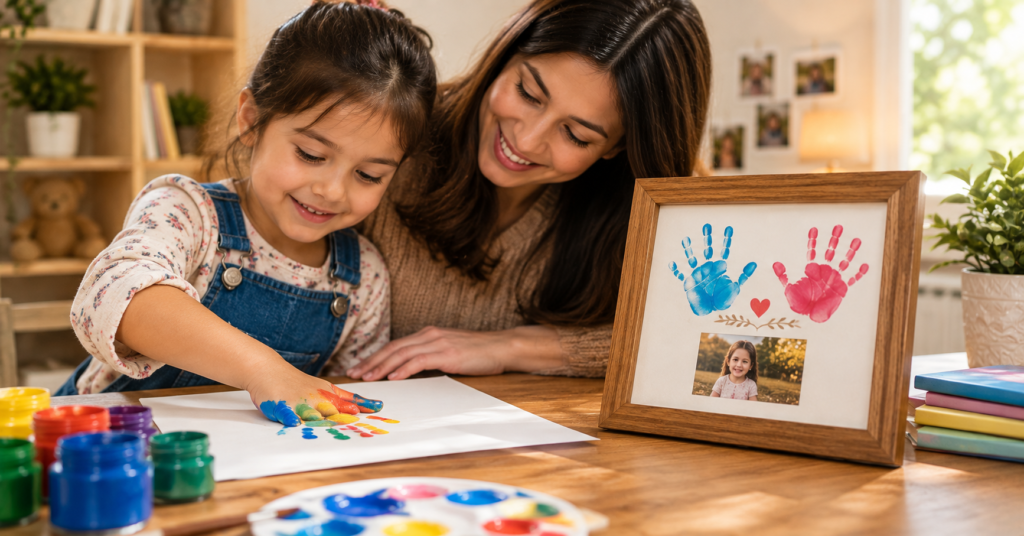
Here’s something most craft blogs don’t talk about: the emotional reason these matter.
Your child’s hand is growing. Right now, it fits in your palm. In five years, it’ll be nearly adult-sized. In fifteen years, they’ll have their own hand to compare yours to.
That’s why handprint ornaments are so powerful. They’re time capsules of growth.
Imagine hanging your tree in December 2025 with your toddler’s tiny handprint ornament. Then in 2026, you make another one and your child’s hand is noticeably bigger. By 2030, you have five ornaments showing the journey from “tiny hand” to “big kid.” By 2040, you have 15 ornaments hanging on the tree, and grandkids are asking, “Which one is Grandpa’s?” as a baby.
Grandparents especially treasure these. A handprint ornament from a grandchild says, “I made this for you. I thought of you.” It’s one-of-a-kind. It can’t be bought. It proves they existed at a specific moment in time.
Teachers hang them in their homes too. Years later, they see a former student on the street and think of the handprint ornament they still have.
The traditional angle: Many families make one handprint ornament every year. By age 18, the child has 18 ornaments and a visual timeline of their hand growing. Parents report this brings them to tears hanging the tree because they can literally see how fast childhood went.
Gift Ideas & Presentation
A handprint craft becomes an even more meaningful gift with thoughtful presentation.
For Grandparents
- Best gift: Handprint plaque, ornament, or a framed photo of the child’s handprint with the date
- Packaging: Wrap in tissue, include a handwritten note: “This is [Child’s Name]’s hand on [Date]. We thought of you when we made it.”
- Shipping: Bubble wrap thoroughly; send in a padded box
- Display: Suggest hanging it on their tree, displaying it on a shelf, or framing it
For Teachers
- Best gift: Handprint card, ornament, or small plaque (“Mrs. Johnson’s Classroom, 2025”)
- Presentation: Include a note from the child: “We made this in December. Thank you for being the best teacher!”
- Timing: Give before winter break
For Siblings or Cousins
- Best gift: Multi-hand wreath, joint handprint artwork, or individual ornaments
- Angle: “Big brother’s hand and baby sister’s hand together on Christmas Day”
For Yourself (Keepsake)
- Best storage: A decorative box labeled with the year; hang ornaments on the tree every year
- Display: Frame large painted handprints; hang plaques in a hallway
- Legacy: Explain to your child why you’re keeping it: “When you’re grown, I want to show you how little your hand was.”
Presentation Packaging Ideas
- Wrap in tissue with a ribbon
- Include a small card: Child’s name, date, age at the time
- Add a note about the story (e.g., “Made this on a rainy Saturday in December”)
- If mailing: Ship with padding and a personal note
FAQ
How long do salt dough handprint ornaments really last?
Sealed salt dough ornaments last 20+ years with proper storage. Unsealed ones last 10–15 years but are more fragile. The key is sealing with Mod Podge or polyurethane immediately after decorating. Store in a cool, dry place away from direct sunlight.
Can I air-dry salt dough instead of baking it?
Yes, but it’s slower and riskier. Salt dough can air-dry fully in 3–7 days in a dry environment, but humidity can cause mold. Most people air-dry for 24 hours, then bake at low temperature (200°F for 30–45 minutes) to speed it up. This hybrid method is faster and more reliable than full air-drying.
What’s the best paint to use on handprints?
Acrylic paint is best; it’s vibrant, durable, and available in tons of colors. Non-toxic washable acrylic is safest for kids. Let it dry fully (24 hours) before sealing. Avoid thick oils or enamel paints, which take too long to dry and can crack.
How do I get a clear, crisp handprint on salt dough?
Press gently but firmly, one finger at a time, rather than slamming the whole hand in. The dough should be ½-inch thick (not too thin, not too thick). If the handprint is blurry, the dough was too dry, add a tablespoon of water and re-knead. Don’t use self-rising flour; it puffs and blurs details.
Is salt dough safe for babies?
Salt dough is not edible. If your baby mouths their hands after crafting, wash them immediately. The salt and flour are non-toxic, but consuming large amounts can cause issues. For babies under 2, use non-toxic washable paint and wash hands right after.
Can you laminate a finished handprint craft?
Yes. Paper-based handprints (cards, painted paper) can be laminated at a print shop for ~$2 per item. This makes them waterproof and archival (last 20+ years). Ornaments and 3D crafts can’t be laminated.
What if the paint cracks on my ornament?
Thin coats of quality acrylic paint rarely crack if sealed properly. If cracking happens, sand the cracked area lightly, repaint with a new thin coat, and seal with Mod Podge. A small crack adds character and doesn’t ruin the ornament seal it to prevent spreading.
Is there a “best time” to make handprint ornaments?
Early December is ideal (gives time for baking/drying), but any time works. The craft is so quick that you can make one in an afternoon. For teachers or group projects, October or early November gives time for organization and mailing if you’re gifting.
