
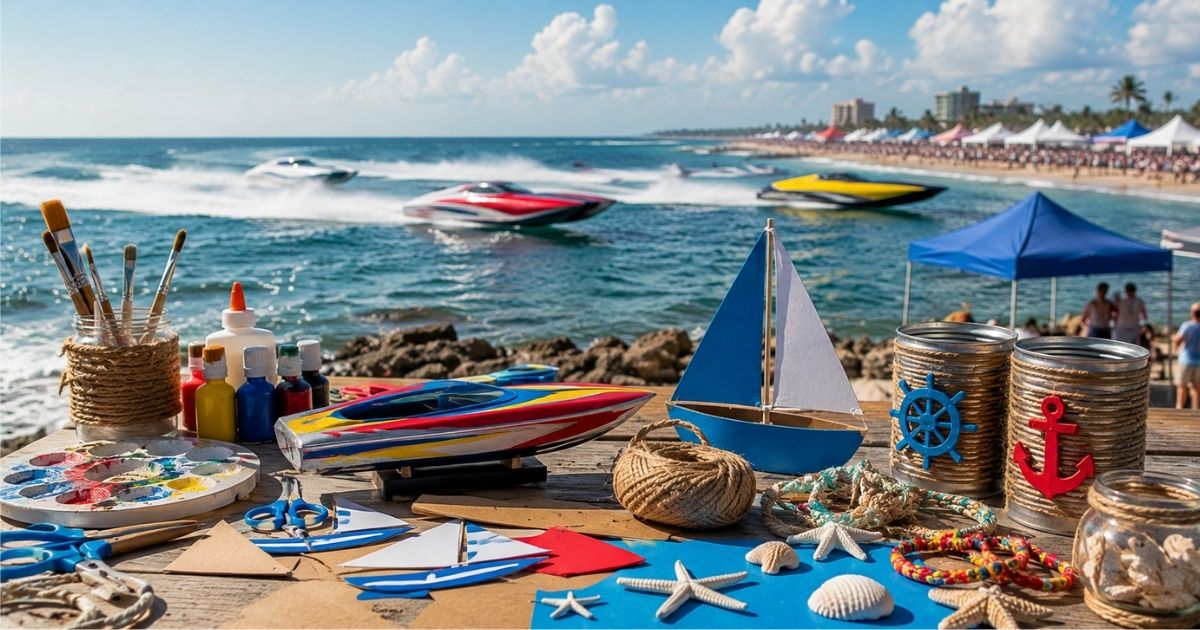
Yes, informal craft zones and vendor areas exist alongside the Thunder on the Gulf festival in Orange Beach, Alabama, though there’s no official “dedicated craft zone” run by the event organizers. Most activities are vendor-run and community-led, materials and costs vary, and you can do every project in this guide at home without traveling. The real value of coastal crafting isn’t the festival it’s the creative process, the materials, and what you take home.
What Is Thunder on the Gulf?
Thunder on the Gulf is an offshore powerboat racing championship held annually along Alabama’s Gulf Coast, centered around Gulf Shores and Orange Beach. The event has run since 2004 and draws racing enthusiasts, families, and tourists who come to watch high-speed boats compete on the water. For the full rundown on the racing itself, see our Ultimate Guide to Orange Beach’s Epic Powerboat Racing Event.
The festival weekend typically includes vendor areas, food trucks, live entertainment, and informal activity zones. Many of these secondary activities—including craft stations are set up by local vendors and community organizers, not the official race organizers. This is important: the craft stations aren’t guaranteed or formally scheduled; they’re part of the cultural ecosystem around the event, not run by the event itself. Our guide to community and events at Thunder on the Gulf covers this broader vendor and community culture in more depth.
The powerboat racing itself is real and well-documented. The peripheral crafting culture is also real, but informal and variable year to year.
Is There Really a Craft Zone?
This is the question every competitor article dodges. Here’s the truth:
What exists: Local artisans, shell vendors, DIY activity stations, and informal craft booths do set up in and around the festival grounds during Thunder on the Gulf. Families report making shell art, jewelry, and small décor pieces. Vendors sell handmade nautical goods. This happens reliably enough that it’s become part of the festival’s expected experience.
What doesn’t exist: An official, organizer-run “craft zone” with guaranteed locations, announced vendors, scheduled demonstrations, or promised booth counts. The articles you see online citing specific attendance numbers, vendor lists, or dedicated areas? Those numbers are mostly unsourced and recycled without verification.
Why this matters: If you’re planning a trip specifically around attending a formal craft workshop at Thunder on the Gulf, call the event organizers or check the official event page first. Don’t rely on third-party claims about what will be there. The informal, vendor-driven crafting culture usually shows up, but it’s not guaranteed the way a featured race or fireworks would be. Our Complete Visitor Guide, Tickets & What To Expect is the best place to confirm what’s actually scheduled before you go.
The better approach: Plan a coastal visit around the racing festival itself, and treat the craft stations as a bonus if they’re there. Or skip the festival crowds entirely and do these projects at home with materials you source yourself.
Why These Coastal Crafts Work So Well
Nautical and beach-themed crafting has stayed popular for years, and it’s not because it’s trendy. It’s because the materials are already sitting on the beach, the projects scale from 10 minutes to an afternoon, and the finished pieces actually get used instead of collecting dust. That same sensory pull is what makes the whole Gulf Coast worth visiting in the first place see our piece on Sun, Sound, and Adrenaline: The Ultimate Gulf Coast Experience for more on that atmosphere.
Good coastal crafts meet three criteria:
- Use materials you can find locally or buy cheaply shells, driftwood, sand, rope, embroidery floss
- Have a clear finish point — not an endless “art project” with no end state
- Produce something functional or giftable — not just decorative clutter
Keep those three rules in mind as you pick projects, and you’ll end up with pieces you actually keep instead of tossing after your trip home.
What You Need: Materials Checklist & Cost Breakdown
Most of these projects use low-cost materials you can source from craft stores, the beach, or online suppliers. Here’s what to stock before you start:
| Category | Items | Cost Est. | Notes |
| Natural Materials | Seashells, driftwood, sand, sea glass | $5–20 | Collect free from beach or buy bulk bags online |
| Adhesives | Hot glue gun + sticks, Mod Podge | $8–15 | Reusable across all projects |
| Paint & Markers | Acrylic paint, paint pens | $5–12 | Get 3–4 colors; stretch across multiple projects |
| String & Rope | Embroidery floss, jute twine, waxed thread | $5–10 | Multi-purpose; one purchase covers several projects |
| Containers | Glass bottles/jars with lids | $0–10 | Reuse food jars or buy at dollar stores |
| Tools | Scissors, sandpaper (fine grit), brushes | $5–8 | One-time investment |
| Extras | Beads, glitter, wooden tags, ribbon | $3–8 | Optional; amplifies finished look |
| TOTAL STARTER KIT | — | $36–83 | Covers ~5 projects; materials stretch across more |
Pro tip: Buy embroidery floss and paint pens before your trip to the Gulf Coast. Beachside gift shops mark these up 40–60% and often have limited colors.
10 Fun Craft Projects — Ranked by Difficulty
Project 1: Sea in a Bottle (Easiest — 10 minutes)
Best for: Kids ages 5+, complete beginners
Difficulty: Easy
Finished gift-worthy? YES — great take-home keepsake
This is the fastest project on this list and one of the most satisfying. Watching the “waves” shift when you tilt it keeps kids (and adults) entertained for hours.
Materials:
- Empty clear plastic or glass bottle with a tight lid
- Water
- Blue food coloring (2–3 drops)
- Baby oil or mineral oil (~¼ of the bottle)
- Optional: fine glitter, tiny plastic sea creatures
Steps:
- Fill the bottle about two-thirds full with water.
- Add 2–3 drops of blue food coloring and shake until the color is even.
- If using glitter or sea creatures, add them now—they’ll float through the oil for effect.
- Slowly pour in the oil until the bottle is nearly full, leaving a small air gap at the top (this lets the liquid move).
- Seal the lid tightly—apply hot glue around the cap threads for a permanent, waterproof seal.
- Tip the bottle side to side and watch the “ocean waves” form.
Time breakdown: 3 min prep + 2 min fill + 5 min seal = ~10 min total
Cost per unit: $1–2
Project 2: Nautical Friendship Bracelets (15 minutes)
Best for: Kids ages 6+, teens, group activities
Difficulty: Easy
Finished gift-worthy? YES — popular swap item
Materials:
- Embroidery floss in 3–4 colors (blue, white, red, or navy/white/tan for subtle look)
- Scissors
- Tape or clipboard to anchor the knotting end
Steps:
- Cut three strands of floss, each about 24 inches long.
- Tie the three strands together at one end, leaving a 2-inch tail.
- Tape the knotted end to a table edge or clip it to a board to keep it stable while you work.
- Braid the three strands in a simple over-under pattern, keeping even tension. Alternate the color placement every few braids to create a striped effect.
- When you’ve braided about 6 inches (enough to wrap loosely around a wrist), knot the three strands together at the end.
- Trim the loose tails. To wear it, tie the bracelet onto your wrist using the top and bottom knots as connection points.
Variation: Skip the tape method and clip the knot to another person’s wrist while you braid—it’s faster and more fun in groups.
Time breakdown: 2 min prep + 15 min braid + 1 min finish = ~18 min total
Cost per unit: $0.50 (floss is cheap; make 10 at once)
Project 3: Layered Sand Art Jar (20 minutes)
Best for: Kids ages 6+, families, groups
Difficulty: Easy
Finished gift-worthy? YES — beautiful shelf décor
Materials:
- Small glass jar with a lid (mason jars work perfectly)
- Colored sand (3–4 colors, from craft stores or dyed yourself)
- Small funnel or rolled paper cone
- Wooden skewer or small spoon
Steps:
- If you want to dye sand yourself: Mix regular sand with a few drops of food coloring in a ziplock bag, seal it, and shake until evenly colored. Spread it on a paper towel to dry for 30 minutes to an hour before using.
- Using the funnel, pour the first color of sand into the jar, filling about ½ inch high.
- Use the wooden skewer to gently tamp the sand flat, creating an even layer.
- Pour the next color of sand, tapping to settle it. Don’t shake the jar—tapping keeps the layers distinct.
- Repeat until the jar is nearly full, alternating colors. Aim for 5–7 layers.
- Optional: Use the skewer to drag it vertically through the layers once, creating a “wave” pattern without mixing the colors completely.
- Seal the lid tightly, and hot-glue around the rim if kids will be handling it.
Time breakdown: 3 min funnel + 12 min layering + 5 min finish = ~20 min
Cost per unit: $2–4 (jar + sand)
Project 4: Shell-Decorated Photo Frame (30 minutes)
Best for: All ages, especially families
Difficulty: Easy
Finished gift-worthy? YES — holds vacation photos beautifully
Materials:
- Plain wooden or cardboard photo frame (dollar stores carry them)
- 15–25 small shells of varying sizes
- Hot glue gun
- Optional: sand and Mod Podge for textured borders
Steps:
- Lay out your shells around the frame’s border before gluing, so you can plan spacing and size balance. Largest shells on corners, medium shells on edges, smallest shells filling gaps.
- Starting at one corner, hot-glue the largest shells first as anchor points.
- Fill gaps with medium and smaller shells, working systematically around the entire frame. Leave no bare wood showing once you’re done.
- Optional: If you want a sand border, brush a thin layer of Mod Podge on any remaining bare spots and sprinkle sand over it. Tap off excess once dry.
- Let the glue set for at least 15 minutes before handling.
- Insert a favorite beach photo from your trip.
Time breakdown: 5 min planning + 20 min gluing + 5 min drying = ~30 min
Cost per unit: $3–6 (frame + shells)
Project 5: Driftwood Welcome Sign (60 minutes + drying time)
Best for: Teens and adults, home décor lovers
Difficulty: Medium
Finished gift-worthy? YES — premium gift, impressive display piece
Materials:
- One flat, smooth piece of driftwood (8–12 inches long)
- Fine-grit sandpaper
- Paint pens or small brush with acrylic paint
- 5–8 small seashells
- Hot glue gun
- Twine for hanging (optional)
Steps:
- Sand the flatter side of the driftwood lightly with fine-grit sandpaper. You’re not trying to make it perfectly smooth—just removing rough edges and any splinters.
- Sketch your word or phrase lightly in pencil first. Try “Welcome,” a family name, a date, or “Paradise Found.” Keep it short (1–2 words).
- Trace over the pencil lines with a paint pen in steady, single strokes per letter. If using acrylic paint, use a small brush and apply 2–3 thin coats rather than one thick coat.
- Let the paint dry fully—this usually takes 20–30 minutes depending on humidity and paint type.
- Hot-glue small shells around the edges or corners as accents. Space them unevenly for a natural look.
- Optional: Attach a small loop of twine to the back if you want to hang it on a door or wall.
Time breakdown: 5 min sand + 5 min sketch + 10 min paint + 25 min dry + 15 min shell gluing = ~60 min (not counting full cure)
Cost per unit: $4–8 (driftwood + paint + glue)
Project 6: Rope-Wrapped Bottle Vase (40 minutes)
Best for: Adults, home décor projects
Difficulty: Medium
Finished gift-worthy? YES — elegant, functional
Materials:
- Glass bottle (wine or beer bottle, cleaned)
- Jute twine or natural rope
- Hot glue gun
- Optional: small dried or artificial flowers
Steps:
- Starting at the base of the bottle, apply a thin line of hot glue around the glass.
- Press the end of the rope/twine firmly into the glue and hold for 3 seconds.
- Wrap the rope tightly around the bottle in a spiral, applying small dabs of glue every 2–3 wraps to keep it secure and even.
- Continue wrapping upward. You can either wrap the entire bottle or stop halfway for a two-tone look (glass on top, rope on bottom).
- Once you reach your desired height, trim the rope and glue the end flat against the bottle.
- Let the glue cool for 10 minutes, then fill with water and fresh or dried flowers.
Time breakdown: 3 min prep + 30 min wrapping + 7 min finishing = ~40 min
Cost per unit: $2–5 (rope + bottle)
Project 7: Coastal Mason Jar Lanterns (35 minutes)
Best for: All ages, perfect for outdoor display
Difficulty: Medium
Finished gift-worthy? YES — creates ambient lighting
Materials:
- Mason jar (pint or quart size)
- Kosher salt or fine sand
- Tea light candle
- Jute twine or rope
- 3–5 small shells
- Hot glue gun
Steps:
- Fill the jar halfway with kosher salt or fine sand—this holds the candle upright and looks coastal.
- Nestle a tea light candle into the salt/sand.
- Wrap twine or rope around the neck of the jar, tying a knot at the back. Leave a small loop at the top if you want to hang it.
- Hot-glue 3–5 shells around the neck of the jar, spacing them evenly. The rope and shells together create a nautical look.
- Let glue cool completely before handling.
- Place outdoors on a patio or table, or hang from a shepherd’s hook if you created a loop.
Safety note: Never leave a lit candle unattended. Use battery-operated tea lights for a safer, still-beautiful option.
Time breakdown: 3 min fill + 5 min candle + 10 min rope + 15 min shell gluing + 2 min finish = ~35 min
Cost per unit: $3–6 per lantern
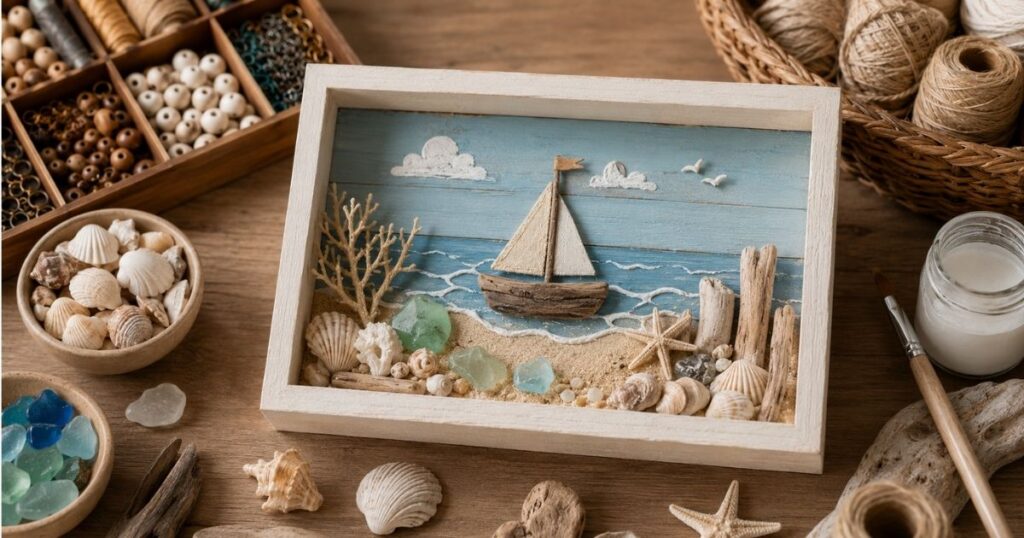
Project 8: Beach-Themed Shadow Box (90 minutes + drying time)
Best for: Family projects, advanced beginners
Difficulty: Medium
Finished gift-worthy? YES — premium frame piece, trip memento
Materials:
- Shadow box frame (available at craft stores, 8×10 is standard)
- Sand
- 8–12 small shells, sea glass, or a small starfish (faux is fine)
- Hot glue gun
- Small printed photo or ticket stub from your trip (optional)
Steps:
- Remove the backing board from the shadow box and lay it flat on your work table.
- Spread a thin, even layer of hot glue across the entire bottom of the backing board.
- Press sand into the glue, tilting the board to remove excess sand once it sets (~2 minutes). You’re creating a textured “beach” base.
- Arrange shells, sea glass, and other materials on top of the sand layer, planning your layout before you glue anything. Odd numbers (3, 5, 7) look more natural than even.
- Hot-glue each piece individually, holding for 3–5 seconds to ensure a strong bond.
- If including a photo or memento, glue it toward one corner or the side so it doesn’t get buried under other items.
- Let everything dry fully—at least one hour, preferably overnight—before closing the frame back up.
- Close the frame and hang it somewhere you’ll actually see it, not stored in a closet.
Time breakdown: 5 min setup + 10 min sand base + 20 min layout + 40 min gluing + 60 min+ drying = ~2+ hours
Cost per unit: $8–15 (frame + materials)
Project 9: DIY Driftwood Wall Art (90 minutes)
Best for: Teens and adults, statement piece
Difficulty: Medium-Advanced
Finished gift-worthy? YES — impressive focal point
Materials:
- 5–8 pieces of flat driftwood in varying sizes
- Wooden backing board (12×18 or 16×20)
- Wood glue or screws + drill
- Sandpaper (fine grit)
- Optional: shells, sea glass, acrylic paint for accents
- Twine or wire for hanging
Steps:
- Lay all your driftwood pieces on the backing board and arrange them in a pleasing pattern—don’t glue yet. Try horizontal lines, a starburst, or a random abstract layout.
- Sand each driftwood piece lightly to smooth out splinters and rough edges.
- Once you’re happy with your layout, use wood glue to adhere each piece, pressing for 30 seconds. Alternatively, drill small pilot holes and use screws for a stronger hold (cleaner than glue lines).
- Let the glue dry for at least 2 hours (or screw immediately).
- Optional: Glue shells or sea glass into gaps, or paint thin accent lines with acrylic paint between the driftwood pieces.
- Attach twine or wire to the back for hanging.
Time breakdown: 10 min arrange + 10 min sand + 20 min glue/screw + 5 min finish + 120 min dry = ~3+ hours (mostly waiting)
Cost per unit: $12–20 (board + driftwood + hardware)
Project 10: Resin Shell Jewelry (120 minutes + curing time)
Best for: Adults, advanced crafters
Difficulty: Advanced
Finished gift-worthy? YES — high-end gift quality
Materials:
- Two-part epoxy resin (craft-grade)
- Small sea glass pieces and shells
- Resin molds (available at craft stores) or silicone ice cube trays
- Jewelry findings (earring posts, bracelet charms, beads)
- Sandpaper (fine grit)
- Optional: glitter, mica powder, dyes for color
Steps:
- Gather shells and sea glass and arrange them in your resin molds. Plan your composition before pouring—what fits in the mold, which pieces are most visible.
- Mix two-part epoxy resin in a disposable cup, following the manufacturer’s directions exactly (mixing ratios matter for proper cure).
- Slowly pour the resin into the mold until it’s halfway full. Let air bubbles rise to the surface and pop them with a toothpick.
- Carefully place shells and sea glass into the resin, pressing them slightly to embed without sinking.
- Top off with the remaining resin until the mold is full. Pop any remaining air bubbles.
- Let cure according to package directions (usually 24–48 hours). Don’t move the mold during this time.
- Once fully cured, remove the resin from the mold. Sand the edges smooth with fine-grit sandpaper.
- Attach jewelry findings (glue earring posts to the back, add jump rings for charms, etc.).
Safety note: Resin fumes can be strong. Work in a well-ventilated area or outdoors. Wear gloves and an apron.
Time breakdown: 15 min prep + 10 min mix and pour + 5 min embed + 48 min curing (done overnight) + 15 min finishing = ~90 min active + 48 hr passive
Cost per unit: $5–12 (resin + mold + findings)
Age-Appropriate Activity Guide
Not every project suits every age. Use this table to match the right craft to who’s doing the crafting:
| Age Group | Best Projects | What They Can Do Independently | Adult Role |
| Ages 3–5 | Sea in a Bottle, Sand Art Jar | Choose colors, pour with guidance | Handle hot glue, supervise closely |
| Ages 6–10 | Sand Art Jar, Friendship Bracelets, Photo Frame | Most steps independently | Supervise scissors, handle hot glue application |
| Ages 11–17 | Friendship Bracelets, Rope Vase, Shadow Box, Driftwood Art | Nearly all steps independently | Check work, supervise first-time hot glue use |
| Adults | Driftwood Sign, Rope Vase, Resin Jewelry, Advanced Art | All steps independently | Create, gift, sell |
If crafting isn’t quite your family’s thing, Thunder on the Gulf weekend has other family-friendly options too our Family Fishing at Thunder on the Gulf guide covers another low-cost, all-ages activity for the trip.
Safety notes:
- Hot glue guns run hot enough to cause burns. Kids under 8 should not operate them; supervise closely for ages 8–12.
- Small shells and sea glass are choking hazards for children under 3. Skip projects with loose small parts or supervise constantly.
- Resin fumes are strong. Kids should not handle two-part epoxy resin; adults only.
Materials Sourcing Guide: Where to Find & Buy
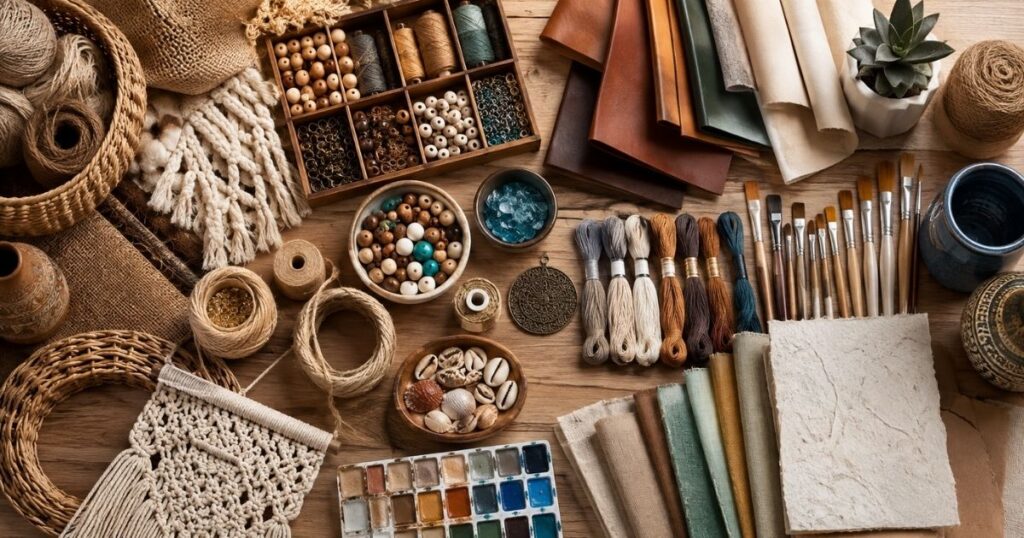
Coastal crafting doesn’t have to be expensive, but knowing where to source materials makes a huge difference in cost and quality.
Beach Collecting (Free, with caveats)
If you’re visiting the Gulf Coast, collecting shells and driftwood from the beach is the most romantic and cost-effective approach—but read the rules first.
Local regulations: Some Gulf Coast beaches limit how much natural material you can remove. Check with the local Parks and Recreation office or beach authority before you collect. Violating collection rules can result in fines.
Best practices:
- Collect shells that are already empty (no living creatures inside—that’s both illegal and unethical).
- Avoid disturbing sand dunes or nesting areas.
- Take only what you’ll use. Leave plenty for other visitors and wildlife.
- Best time to collect: Early morning after storms when shells wash ashore; tides reveal more material.
- Best locations: Jetties and rocky areas tend to have larger shell accumulations than flat sandy beaches.
Cost: Free (plus 1–2 hours of beachcombing time)
Craft Stores (Convenient, marked up 20–50%)
Michaels, Joann Fabrics, and local craft shops carry pre-packaged shells, driftwood, sand, and all basic craft supplies.
Pros: Curated selections, consistent quality, available immediately
Cons: Higher cost than online; limited driftwood sizes; shells are often bleached or uniform (less character)
Smart shopping: Buy materials during sales (these stores run 40–50% off coupons constantly). Stock up on basics like glue guns, paint pens, and embroidery floss in bulk.
Cost: $3–8 per pound for shells; $2–5 per piece for driftwood
Online Bulk Suppliers (Cheapest for quantity)
Sites like Amazon, etsy.com artisans, and wholesale suppliers like Bulk-Buy carry shells and driftwood in 5–10 lb bags.
Pros: Bulk pricing (50–60% cheaper than craft stores); wide variety; good for projects you plan to make multiple times
Cons: Shipping costs add up; minimum orders; you can’t inspect quality before buying
Recommended suppliers:
- Amazon: Shells & Driftwood bulk bags, cheap, fast shipping
- Etsy: Small artisans selling hand-collected Gulf shells (higher price but highest quality)
- Alibaba/Global wholesale: Extremely cheap but shipping is slow (2–4 weeks)
Cost: $1–3 per pound for bulk shells; $0.50–2 per piece for driftwood
Local Artisans & Gulf Coast Markets
If you visit Thunder on the Gulf or any Gulf Coast beach town, talk to local shell vendors and artisans. They often sell bulk material at reasonable prices and can guide you on what’s native to the area.
Cost: $2–6 per pound, with expert local advice included
Planning Your Festival Visit: Practical Tips
If you’re thinking about attending Thunder on the Gulf specifically for the craft activities, here’s how to plan:
Timing:
- Thunder on the Gulf typically runs over a weekend in October, though dates vary year to year.
- Check the official event page (thunderonthegulfofficial.com or similar) for exact 2026 dates before booking.
- Arrive Friday morning to avoid the largest crowds and claim a good parking spot.
Logistics:
- Parking: Festival parking is usually free but fills up by mid-morning. Arrive early or use street parking nearby.
- Admission: General festival admission typically costs $10–20 per person, though some areas are free to roam. Individual craft stations may charge $5–15 per person per activity.
- What to bring: Hat, sunscreen, small bag for finished projects and vendor purchases, cash (not all vendors take cards), water bottle.
Craft activities:
- Informal craft stations are usually open during daylight hours (7 AM–6 PM) throughout the festival weekend.
- No reservations needed for most stations—it’s first-come, first-served.
- Most stations take 20–45 minutes per activity, so you can easily fit in 3–4 different projects in one day.
Vendor booths:
- Local artisans typically sell finished pieces, supplies, and sometimes run workshops.
- Budget $20–80 for vendor purchases if you want to support local makers.
Real talk: The festival is worth visiting for the powerboat racing and the Gulf Coast atmosphere. Treat the craft stations as a bonus, not the main draw. You’ll have more control, lower stress, and often a better creative experience doing projects at home.
Turn Your Crafts Into Gifts or a Small Business
If you’ve made a few projects and loved them, you might wonder: could this become a side business?
The answer is yes—for certain people and under the right conditions.
Why Coastal Crafts Sell Well
People buy handmade coastal crafts for three reasons: nostalgia (vacation memories), authenticity (real Gulf materials beat mass-produced), and personalization (you can custom-order projects). These are strong emotional drivers.
Where to Sell
Etsy is the most accessible platform. Sellers on Etsy make $200–2,000+ per month on coastal crafts, depending on pricing, marketing, and production volume. Set up is free; Etsy takes a 6.5% transaction fee plus payment processing.
Local markets & craft fairs are lower-cost ways to test your work. Booth fees are $20–50; profit margins are higher since there’s no platform fee.
Instagram + direct sales builds a brand faster than you’d expect. Post finished work, tag #thunderonthegulf and #coastalcrafts, and link to a PayPal or Shopify store.
Realistic Pricing & Margins
Here’s where most beginners fail: underpricing.
- A sand art jar takes 20 minutes and costs $2 in materials. Sell it for $8–12, not $4.
- A resin pendant takes 2 hours (split across curing time) and costs $5 in materials. Sell it for $18–25.
- A driftwood sign takes 60 minutes and costs $6 in materials. Sell it for $25–35.
Why these prices work: You’re paying for skill, curation, design, packaging, and the emotional appeal of coastal living. Customers aren’t just buying materials; they’re buying the story and the creativity.
First Steps
- Make 5–10 finished pieces of 2–3 different designs.
- Take professional photos (natural light, clean background).
- List them on Etsy or your Instagram.
- Get feedback. Adjust based on what sells.
- Scale production only after you’ve proven there’s demand.
Honest truth: Most craft side businesses stay small ($500–2,000/year). A few breakout and become full-time. The key is consistency, quality, and genuine passion for the work—not just wanting to make money.
Safety, Sustainability & Ethics
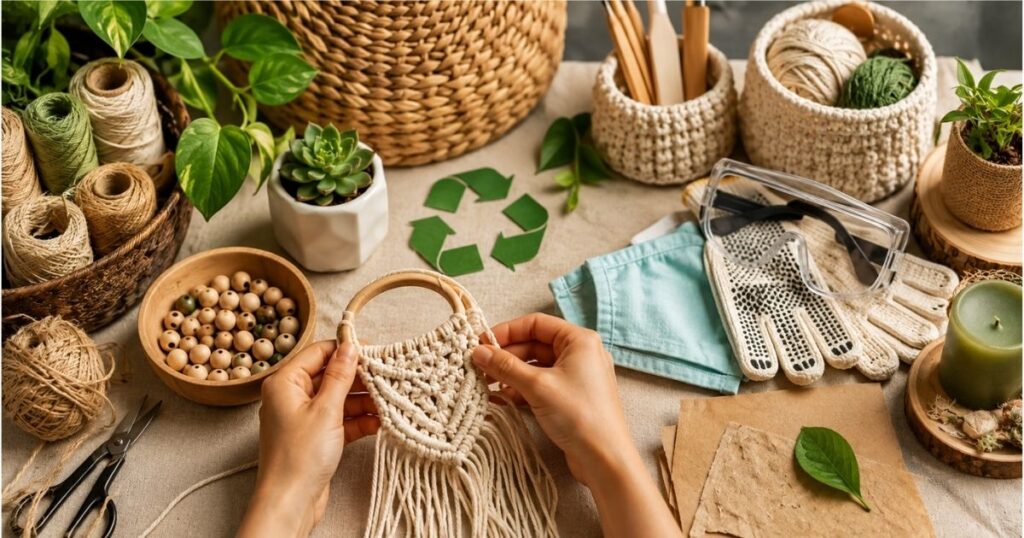
Hot Glue Gun Safety
- Hot glue reaches 380°F. A burn is instant.
- Kids under 8: Adults should handle all hot glue application.
- Kids 8–12: Supervise closely. Teach proper trigger control (short, gentle squeezes). Have cool water nearby.
- Adults: Even if you’ve used hot glue 1,000 times, accidents happen. Work deliberately and never point the gun at yourself or others.
Shell & Driftwood Collecting Ethics
Responsible sourcing matters for both the environment and your conscience.
Do:
- Collect empty shells only—no living creatures inside.
- Respect local collection regulations (some beaches have strict limits).
- Leave enough shells and materials for wildlife and other visitors.
- Choose shells that have already weathered on the beach, not freshly live ones.
Don’t:
- Harvest live shells (mollusks, hermit crabs).
- Damage coral or sea grass while collecting.
- Remove more material than you’ll actually use.
- Ignore posted beach access or collection rules.
Sustainable alternatives:
- Buy pre-cleaned, ethically sourced shells from reputable suppliers (check Etsy reviews).
- Use lab-made or recycled shells and glass (these are becoming more available).
- Substitute driftwood from lumber yards with reclaimed wood pieces (just as beautiful).
Eco-Friendly Crafting Practices
- Reuse and upcycle: Use glass jars from food, wine bottles, and other household items instead of buying new containers.
- Choose non-toxic adhesives: Hot glue is generally safe, but research epoxy resin brands for low-VOC options.
- Natural dyes: Use food coloring instead of synthetic dyes for sand art.
- Recycled rope: Jute twine and rope are biodegradable and natural.
FAQs
Is there an official craft zone at Thunder on the Gulf?
No. Craft activities and vendor booths exist alongside the festival, but there’s no official, organizer-run “craft zone” with guaranteed locations or scheduled demonstrations. Vendor booths are community-led and informal. If crafting is central to your visit, call ahead to confirm what vendors will be there.
What ages can participate in these projects?
Ages 3+, with adult supervision. Sea in a Bottle and Sand Art Jar are easiest for young kids (ages 3–6). Friendship bracelets and photo frames work for ages 6+. Teens can handle most intermediate projects. Adults get the most satisfaction from advanced projects like driftwood art and resin jewelry.
Can I do these projects without visiting the festival?
Absolutely. The projects are the real value—not the festival itself. You can make every single project in this guide at home using materials sourced online or from a craft store. The only advantage of the festival is the atmosphere and ready availability of local shells.
How much does it cost to make one project?
A: Budget $2–15 per project depending on complexity:
- Sea in a Bottle: $1–2
- Friendship Bracelets: $0.50
- Sand Art Jar: $2–4
- Photo Frame: $3–6
- Driftwood Sign: $4–8
- Rope Vase: $2–5
- Mason Jar Lantern: $3–6
- Shadow Box: $8–15
- Driftwood Art: $12–20
- Resin Jewelry: $5–12 per piece
Is there a “best time” to visit Thunder on the Gulf?
Festival dates are typically in October, but confirm the official 2026 schedule first. Arrive early in the morning (7–8 AM) to beat crowds and secure parking. Weekday visits (if the festival runs Monday–Friday) are less crowded than weekends.
What’s the difference between DIY at home vs. attending the festival?
At home: Full control, lower cost, no travel, no crowds, you set the pace. At festival: Atmosphere, community energy, access to local vendors, chance to buy pre-made artisan pieces, instant gratification of crafting alongside other people. Neither is objectively better—it depends on what you value.
Are these crafts beginner-friendly?
Yes, completely. Projects 1–4 require no prior craft experience. Projects 5–8 are intermediate and assume you’ve used a hot glue gun before. Projects 9–10 require some spatial reasoning and patience but no specialized training.
Where can I buy materials if I’m not near the Gulf Coast?
Online: Amazon, Etsy, craft supply wholesalers carry bulk shells and driftwood. Local: Any Michaels, Joann Fabrics, or craft store. Budget: Plan $30–60 for a full starter kit with enough materials for 5–8 projects.
